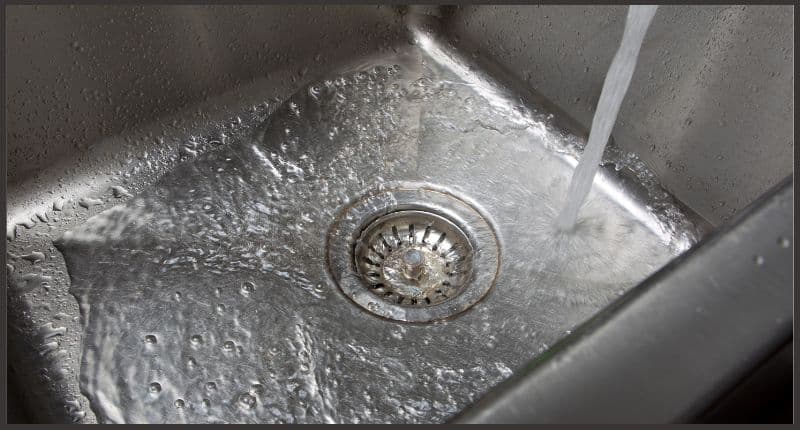
Are you looking for how to increase water pressure in kitchen sink? Few things are more annoying in a household than low water pressure in the kitchen sink. Whether you’re trying to rinse off some dishes, fill a pot for pasta, or simply wash your hands, low water pressure can turn these simple tasks into a time-consuming ordeal. Fear not; there are several practical steps to increase water pressure that you can execute either by yourself or through minimal professional assistance.
Table of Contents
Step-by-step Guide to Increasing Water Pressure in Your Kitchen Sink
Clean or Replace the Aerator
The problem could be as simple as a clogged aerator, which suffers from accumulated sediments over time stopping it from delivering water effectively. Unscrew the aerator from the end of the faucet and carefully disassemble it. Rinse off any debris on the screen. Soak it in a vinegar solution for an hour if required, then scrub lightly with a toothbrush. If the buildup is too extreme, you may have to replace the aerator.
Check the Water Valve
Sometimes, the valve that controls the water supply to your kitchen sink may not be fully open, limiting water flow. Locate the valve and ensure it’s opened completely. This valve is typically located under the sink, in the cabinet or on the wall behind. If the problem persists despite opening the valve fully, it might be defective and need replacement.
Examine the Pressure Regulator
If cleaning the aerator and adjusting the water valve fails to improve the situation, you should check your home’s water pressure regulator. Not all homes have one, but if yours does, it will usually be located on the line where water enters your home. If you suspect a problem, you may need to call a plumbing professional, as adjusting or replacing a pressure regulator requires specialized knowledge.
Look Out for Leaks
A significant leak in your household plumbing can lead to reduced water pressure. Check all exposed pipes around your property, specifically in the basement, crawl spaces, or near the water heater, for signs of leaking. If you detect a leak, a professional plumber may be required to conduct the necessary repairs.
Water Softener Issues
If you’re using a water softener system, the problem could emanate from here. Sometimes, the machine might malfunction or clog, subsequently reducing water pressure throughout the house. Try bypassing the water softener and then check the water pressure to diagnose the problem area.
Check for Pipe Corrosion
Over time, steel or galvanized water pipes can corrode from the inside, causing blockages that reduce the water flow. If other remedies fail, consider hiring a plumber to inspect your pipes for potential corrosion.
Consult a Professional
If the issue persists despite all these DIY fixes, it might be time to consult a professional plumber. Sometimes, the problem might be more complex, such as an issue with the municipal water supply or something that requires a significant plumbing alteration in your home.
Takeaway
Increasing your kitchen sink’s water pressure does not have to be a complicated process. Quite often, the solution is as simple as cleaning your aerator or making sure the water valve is fully open. However, if the problem persists, it may be time to consult a professional for a more comprehensive solution. Consequently, faster flowing water enables you to carry out your kitchen tasks more efficiently, and who knows, perhaps even your dishes will be cleaner, too!
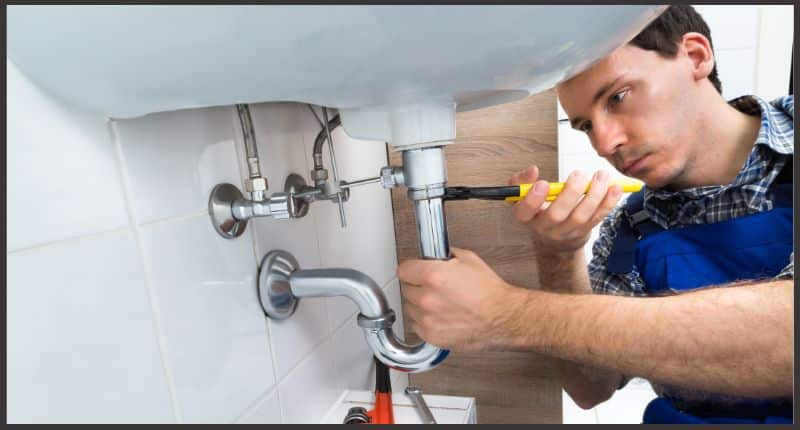
Replace Old Pipes or Clogged Pipes
If you suspect that old or clogged pipes are contributing to the low water pressure in your kitchen sink, you can take steps to address this issue. Here’s how to replace old or clogged pipes:
- Turn Off the Water Supply: Before you begin any plumbing work, shut off the water supply to your kitchen sink. Locate the water shut-off valve under the sink or at the main water supply for your home and turn it off.
- Gather Necessary Tools and Materials: You will need the following tools and materials:
- Pipe wrench
- Plumber’s tape (Teflon tape)
- New pipes (if you’re replacing old pipes)
- Pipe cutter or hacksaw (if cutting and replacing sections of pipe)
- Bucket or towels to catch any residual water
- Remove Old Pipes: If you’re replacing old pipes, start by disconnecting the existing pipes under the sink. Use a pipe wrench to loosen and remove the connections, including any nuts, bolts, or couplings.
- Inspect and Clean: Examine the removed pipes for signs of corrosion, mineral deposits, or clogs. If the pipes are clogged, you can try to clean them by using a pipe brush or a vinegar solution. If the pipes are severely corroded or damaged, it’s best to replace them.
- Replace Pipes: If you decide to replace the pipes, measure the length of the new pipes needed and cut them to the appropriate size using a pipe cutter or hacksaw. Ensure that the new pipes are the correct size and type to fit your plumbing system.
- Apply Plumber’s Tape: Wrap plumber’s tape (Teflon tape) around the threads of the pipe fittings to create a watertight seal. This is important for preventing leaks.
- Install New Pipes: Connect the new pipes to the sink’s fixtures and to the main water supply lines. Use a pipe wrench to secure the connections, making sure they are tight but not over-tightened, which can damage the threads.
- Turn On the Water: After you have replaced or cleaned the pipes and made all the necessary connections, turn the water supply back on. Check for any leaks, and if you see any, tighten the connections further.
- Test Water Pressure: Turn on the kitchen sink’s faucet to check if the water pressure has improved. If you still experience low water pressure, you may need to consider other solutions or consult a professional plumber.
Replacing old or clogged pipes can significantly improve water pressure in your kitchen sink. However, if you’re not comfortable with this task or if the low water pressure issue persists, it’s advisable to consult a professional plumber for a thorough inspection and resolution.
Adjust Pressure Regulator (if applicable)
Adjusting the pressure regulator can be an effective way to increase water pressure in your kitchen sink if your plumbing system is equipped with one. Here’s how to adjust the pressure regulator:
- Locate the Pressure Regulator: The pressure regulator is typically located on the main water supply line, often near the water meter or where the water supply enters your home. It’s a bell-shaped device with an adjustment screw or knob.
- Turn Off the Water Supply: Before making any adjustments, it’s essential to turn off the water supply to your home. You can do this by closing the main water shut-off valve.
- Release Pressure: To avoid any residual water pressure in the system, open a faucet in your home until there is no water flow. This will ensure that the pressure regulator can be safely adjusted.
- Adjust the Pressure: Use a wrench or pliers to turn the adjustment screw or knob on the pressure regulator. Turning it clockwise (usually to the right) will increase the pressure, while turning it counterclockwise (usually to the left) will decrease the pressure. Make gradual adjustments and test the water pressure in your kitchen sink after each adjustment.
- Test the Water Pressure: With the adjustment made, turn the water supply back on and test the water pressure at your kitchen sink. Ensure that the pressure is at the desired level. If it’s still too low, make additional adjustments as needed.
- Fine-Tune the Pressure: You may need to fine-tune the pressure to achieve the optimal balance between water pressure and the potential for damage to your plumbing system. Be cautious not to set the pressure too high, as excessive pressure can lead to leaks, burst pipes, or damage to fixtures.
- Monitor for Leaks: After making adjustments, check for any leaks around the pressure regulator. If you notice leaks, tighten the connections or replace any damaged components.
- Keep Safety in Mind: Always follow the manufacturer’s guidelines for adjusting the pressure regulator, as specific instructions may vary depending on the model and brand. Be cautious and don’t force the adjustment, as you can damage the regulator if you apply excessive force.
Adjusting the pressure regulator can be an effective way to increase water pressure in your kitchen sink, but it’s essential to be cautious and make gradual adjustments to prevent potential damage to your plumbing system. If you’re uncertain about how to adjust the regulator or if the problem persists, it’s advisable to consult a professional plumber for assistance.
Conclusion: How to Increase Water Pressure in Kitchen Sink
In conclusion, increasing water pressure in your kitchen sink is essential for efficient daily tasks and a more satisfying user experience. The steps to achieve this include:
- Checking for external factors such as ensuring the main water valve is fully open and fixing any leaks in the plumbing system.
- Cleaning the aerator to remove mineral deposits that may be obstructing the flow of water.
- Replacing old or clogged pipes if they are contributing to the low water pressure.
- Adjusting the pressure regulator (if applicable) to optimize water pressure while avoiding excessive pressure that could damage your plumbing.
- Installing a booster pump if persistent low water pressure is a recurring issue in your home.
- Consulting a professional plumber if you are unable to resolve the problem on your own or if you encounter complex plumbing issues.
By following these steps and addressing the specific issues contributing to low water pressure, you can enjoy improved water pressure in your kitchen sink, making daily chores and cooking more efficient and enjoyable. If in doubt or if the problem persists, don’t hesitate to seek the assistance of a qualified plumber to ensure your plumbing system operates at its best.
Additional Guide
If you’re looking to enhance your kitchen space, our website offers a comprehensive step-by-step guide on “How to Build a Kitchen Island.” Whether you’re a seasoned DIY enthusiast or a beginner, this resource at One Kitchen Review will provide you with valuable insights and instructions for your project.
Additionally, if you’re planning to upgrade your kitchen fixtures, we’ve put together a comprehensive guide on “How to Measure Kitchen Sink.” This resource at One Kitchen Review will assist you in ensuring the perfect fit for your new kitchen sink, making the installation process smooth and hassle-free.
FAQs: How to Increase Water Pressure in Kitchen Sink
- Why is the water pressure in my kitchen sink low?
- Low water pressure in your kitchen sink can be caused by various factors, including clogged pipes, a faulty pressure regulator, leaks, or mineral deposits in the faucet’s aerator.
- How can I check for leaks in my plumbing system?
- Look for visible leaks around pipes, connections, and fixtures. You can also conduct a water meter test to check for hidden leaks by turning off all water sources and monitoring the meter for any movement.
- What is a pressure regulator, and where is it located?
- A pressure regulator is a device that controls the pressure of water entering your home. It is typically located on the main water supply line near the water meter or where the water enters your home.
- How do I clean the aerator on my kitchen faucet?
- Remove the aerator from the faucet spout and soak it in a vinegar solution to dissolve mineral deposits. Use a brush to scrub away any remaining debris before reattaching the aerator.
- Can I adjust the pressure regulator on my own?
- You can adjust the pressure regulator yourself, but it’s important to follow the manufacturer’s instructions and make gradual adjustments. Excessive pressure can damage your plumbing, so be cautious.
- Do I need a professional plumber to increase water pressure in my kitchen sink?
- You can attempt many of the steps on your own, but if the issue persists or if you’re uncomfortable making adjustments, it’s advisable to consult a professional plumber for a thorough assessment and resolution.
- How do I choose the right booster pump for my plumbing system?
- The choice of a booster pump depends on your specific needs and the extent of the low water pressure issue. A plumber can recommend an appropriate pump based on your situation.
- What are the common signs of clogged pipes that may affect water pressure?
- Signs of clogged pipes include reduced water flow, slow draining, gurgling sounds, and unpleasant odors. If you suspect clogs, inspect the pipes for blockages.
- Can I increase water pressure in my kitchen sink without any tools or equipment?
- In some cases, you can improve water pressure by cleaning the aerator, but most other solutions may require tools, such as a pipe wrench, pipe cutter, or pliers, depending on the specific issue.
- Why is water pressure in my kitchen sink important?
- Adequate water pressure is essential for performing daily kitchen tasks efficiently, including washing dishes, cooking, and filling pots and pans. It also ensures that your kitchen fixtures operate at their best.